International Yoga Day 2024- 5 Yoga Asanas You Can Try For Anti Aging
By: Priyanka Maheshwari Fri, 21 June 2024 10:14:34

Yoga, an ancient practice originating from India, has gained tremendous popularity worldwide for its numerous physical, mental, and spiritual benefits. Among its many advantages, yoga has been recognized for its potential anti-aging effects, helping individuals maintain vitality and overall well-being as they age.
Yoga is a holistic discipline that encompasses various physical postures (asanas), breathing exercises (pranayama), meditation, and ethical principles. Its multifaceted approach addresses both the body and mind, making it an ideal practice for those seeking to combat the effects of aging.
One of the primary ways in which yoga contributes to anti-aging is through its ability to promote flexibility and strength. As we age, our muscles tend to become stiffer and weaker, leading to decreased mobility and an increased risk of injury. Yoga postures gently stretch and strengthen the muscles, joints, and connective tissues, enhancing flexibility and maintaining a healthy range of motion. By regularly practicing yoga, individuals can counteract the loss of flexibility associated with aging and enjoy improved physical function.
Furthermore, yoga supports the body's natural detoxification processes, which can slow down the aging process. Deep breathing techniques and specific yoga poses stimulate blood circulation, promoting the elimination of toxins from the body. Increased blood flow nourishes the cells and organs, helping to maintain their optimal functioning and overall vitality.
Stress reduction is another crucial aspect of yoga that contributes to anti-aging. Chronic stress has been linked to various age-related ailments, including cardiovascular disease, cognitive decline, and premature aging. Yoga encourages relaxation, mindfulness, and deep breathing, activating the body's relaxation response and reducing stress levels. By managing stress effectively, yoga practitioners can experience improved sleep, enhanced mental clarity, and an overall sense of calm, which can contribute to a more youthful appearance and a higher quality of life.

# Eye Circle
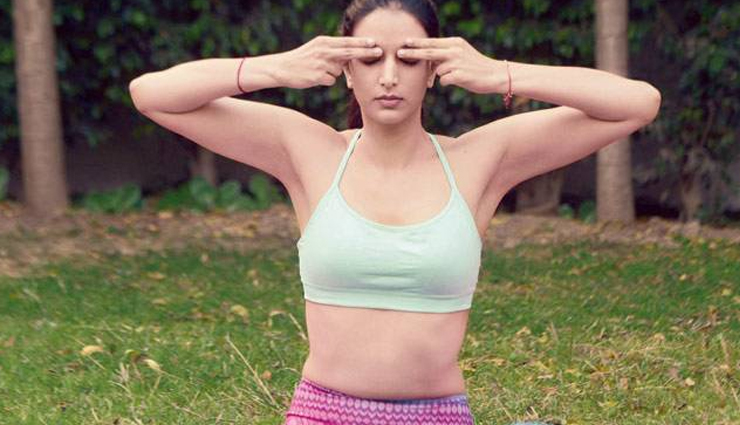
Eye Circle yoga, also known as eye exercises or eye yoga, is a set of simple exercises that help strengthen and relax the muscles around the eyes, reduce eye strain, and improve overall eye health. Here's a step-by-step guide on how to do Eye Circle yoga:
- Find a quiet and comfortable place to sit. You can use a chair or sit cross-legged on the floor, ensuring that your back is straight and relaxed.
- Close your eyes and take a few deep breaths to relax your mind and body.
- Slowly open your eyes and focus your gaze straight ahead.
- Begin by gently moving your eyes in a circular motion. Imagine that your eyes are tracing a large circle clockwise. Keep your head still and use only your eyes to move in a circular motion. Do this for 5-10 rotations.
- After completing the clockwise circles, reverse the direction and perform 5-10 rotations in a counterclockwise direction.
- Take a short break by closing your eyes and relaxing for a few seconds.
- Next, focus your gaze on an object or point in front of you, preferably at eye level. Shift your gaze from that point to an object on your right side, then back to the center, and then to an object on your left side. Repeat this side-to-side movement 5-10 times.
- Again, take a short break by closing your eyes and allowing them to rest.
- Finally, gently massage your temples in a circular motion with your fingertips for 10-15 seconds. This helps relax the muscles around the eyes and promotes blood circulation.
- Close your eyes and take a few deep breaths to conclude the Eye Circle yoga practice.
It's important to note that Eye Circle yoga should be done with gentle movements and without straining the eyes. If you wear contact lenses or have any pre-existing eye conditions, it's advisable to consult with an eye care professional before starting any eye exercises.
Regular practice of Eye Circle yoga can help relieve eye strain, improve focus, and maintain healthy eye function. It's recommended to incorporate these exercises into your daily routine, especially if you spend long hours working on screens or engaging in activities that strain your eyes.

# Forehead Yoga
Forehead yoga, also known as forehead exercises or forehead tapping, is a simple technique that helps release tension and promote relaxation in the forehead and the muscles around the eyes. Here's a step-by-step guide on how to do Forehead Yoga:
- Find a quiet and comfortable place to sit. You can use a chair or sit cross-legged on the floor, ensuring that your back is straight and relaxed.
- Close your eyes and take a few deep breaths to relax your mind and body.
- With your eyes still closed, bring your fingertips together in a prayer position, placing them in the middle of your forehead, just above the space between your eyebrows.
- Apply gentle pressure with your fingertips to the forehead. Feel the connection between your fingertips and your forehead.
- Start tapping your fingers on your forehead in a rhythmic and gentle manner. Begin with slow and soft taps, gradually increasing the speed and intensity according to your comfort level. The tapping motion should be light and not cause any discomfort.
- As you tap, focus on releasing any tension or stress that may have accumulated in the forehead area. Imagine the tension dissipating with each tap.
- Continue tapping for about 1-2 minutes, or longer if you prefer. Allow yourself to fully immerse in the sensation and the relaxation that comes with the tapping.
- After the tapping session, gradually reduce the intensity and speed of the taps, transitioning to a gentle and slow touch on the forehead.
- Slowly remove your fingertips from the forehead and take a moment to observe any sensations or feelings in the forehead area.
- Take a few deep breaths, and when you're ready, gently open your eyes.
Forehead yoga can be practiced whenever you feel tension or tightness in your forehead or want to promote relaxation. It's a simple technique that can be done anywhere, anytime. Experiment with the tapping speed and intensity to find what works best for you. Remember to listen to your body and adjust the pressure and motion to avoid any discomfort.
Incorporating Forehead Yoga into your routine can help relieve stress, calm the mind, and promote overall well-being. It can be a useful practice during moments of high mental or emotional tension, or simply as a way to relax and rejuvenate your forehead area.

# Smile Soother
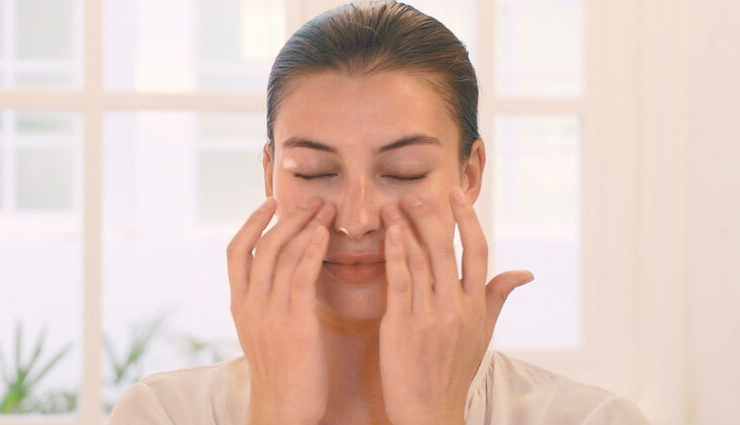
"Smile Soother" yoga, also known as "Cheek Lift" or "Face Yoga Smile," is a technique that focuses on toning and relaxing the muscles in the cheeks, jaw, and mouth area. It can help reduce tension and promote a more relaxed and youthful-looking smile. Here's a step-by-step guide on how to do Smile Soother yoga:
- Find a comfortable seated position, ensuring that your back is straight and relaxed.
- Take a few deep breaths to center yourself and relax your mind and body.
- Relax your facial muscles and bring your attention to your mouth and cheek area.
- Gently close your lips together without clenching your teeth. Keep your facial muscles soft and relaxed.
- Slowly and gently smile with your lips closed. Feel the gentle stretch in your cheek muscles as you lift the corners of your mouth upwards.
- Hold the smile for a few seconds, feeling the warmth and relaxation spreading through your cheek muscles.
- While maintaining the smile, start to move your cheek muscles up and down in a gentle pulsating motion. This motion is similar to a baby's smile or when you naturally smile with genuine happiness.
- Continue the pulsating motion for about 10-15 seconds, focusing on the gentle contraction and relaxation of the cheek muscles.
- Gradually release the smile and relax your facial muscles. Take a moment to notice any sensations or changes in your cheek and mouth area.
- Repeat this Smile Soother exercise 2-3 times, or as desired, to fully benefit from its effects.
Remember to maintain a gentle and relaxed facial expression throughout the exercise. Avoid any strain or tension in the jaw or facial muscles. If you experience any discomfort, reduce the intensity or duration of the exercise.
Incorporating Smile Soother yoga into your daily routine can help relax and tone the muscles in your cheeks and mouth area, contributing to a more vibrant and relaxed smile. Regular practice can enhance facial muscle awareness and promote a sense of well-being.

# Face Taping
Face Taping yoga, also known as Face Yoga Tape Method or Facial Taping, is a technique that uses gentle tape application on specific areas of the face to help lift and tone the facial muscles. It aims to reduce the appearance of wrinkles and promote a more youthful complexion. Here's a step-by-step guide on how to do Face Taping yoga:
Note: Before starting Face Taping, make sure your face is clean and free of any oils or lotions.
- Gather the necessary materials: hypoallergenic adhesive tape (such as surgical tape or specially designed face tape), scissors (if needed), and a mirror.
- Identify the areas of your face where you want to focus on lifting and toning. Common areas include the forehead, temples, eyebrows, cheeks, nasolabial folds (lines between the nose and mouth), and jawline. Choose one or two areas to start with.
- Cut a piece of tape that is long enough to cover the desired area. Ensure that the tape is wide enough to provide adequate support but not too wide to be uncomfortable.
- Holding one end of the tape, gently lift the skin in the chosen area. Smoothly apply the tape along the natural contours of your face, gently pressing it onto the skin. Avoid stretching the tape too tightly or pulling the skin excessively.
- Once the tape is applied, use your fingertips to press it down and ensure it adheres well to the skin.
- Stand in front of a mirror and observe the effects of the taping. You may notice a gentle lift and smoothing effect in the taped area.
- Repeat the taping process on other areas of the face if desired, following the same steps.
- Leave the tape on for the desired duration. You can keep it on for a few hours or overnight, depending on your comfort level and the specific instructions provided with the tape you are using.
- When you're ready to remove the tape, gently peel it off in the direction of hair growth. Be careful and slow to avoid any discomfort or skin irritation.
- After removing the tape, gently massage the area to promote circulation and relaxation of the facial muscles.
It's essential to approach Face Taping with caution and to follow the instructions provided with the specific tape you're using. If you have any skin sensitivities or allergies, it's advisable to test a small patch of skin before applying the tape to your entire face.
Remember that Face Taping yoga is just one aspect of a comprehensive facial exercise and self-care routine. It's beneficial to combine it with other face yoga exercises, facial massages, proper hydration, and a healthy lifestyle to promote overall skin health and a youthful appearance.

# The Giraffe
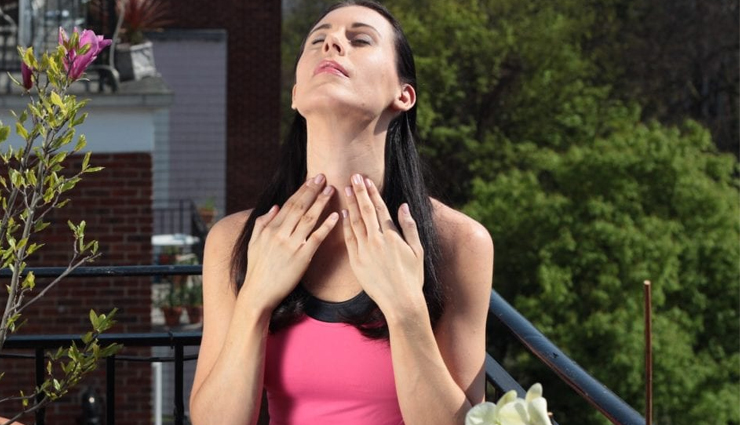
"The Giraffe" is a popular facial yoga exercise that targets the muscles in the neck and chin area, helping to tone and strengthen them. It can help reduce the appearance of a double chin and promote a more defined jawline. Here's a step-by-step guide on how to do "The Giraffe" yoga exercise:
- Sit or stand up straight with your shoulders relaxed and your spine elongated.
- Take a few deep breaths to relax your mind and body.
- Slowly tilt your head back, stretching your neck upward while keeping your gaze forward. Imagine reaching the ceiling with the back of your neck.
- While keeping your head tilted back, bring your lips together and slightly part your teeth. Make sure your jaw is relaxed and not clenched.
- In this position, start to move your lower jaw up and down, as if you were trying to scoop something with your lower teeth. Engage the muscles in your neck and chin as you perform this movement.
- As you move your jaw up and down, try to feel a gentle stretch and contraction in the muscles of your neck and chin area.
- Repeat the jaw movement 10-15 times or as many as feels comfortable for you.
- After completing the repetitions, return your head to a neutral position, with your chin parallel to the ground.
- Take a moment to relax your neck and jaw, and observe any sensations in the targeted muscles.
- You can repeat "The Giraffe" exercise 2-3 times, or as desired, to fully benefit from its effects.
It's important to approach "The Giraffe" exercise with gentleness and avoid any strain or discomfort. Start with a small range of motion and gradually increase it as you become more comfortable with the movement. Remember to keep your breathing relaxed throughout the exercise.
Incorporating "The Giraffe" yoga exercise into your regular routine can help strengthen the muscles in your neck and chin, promoting a more defined jawline and reducing the appearance of a double chin. Consistency is key, so aim to practice regularly to maximize the benefits.


