5 Yoga Asanas You Can Try To Make Your Skin Better
By: Priyanka Maheshwari Sat, 17 June 2023 01:06:30
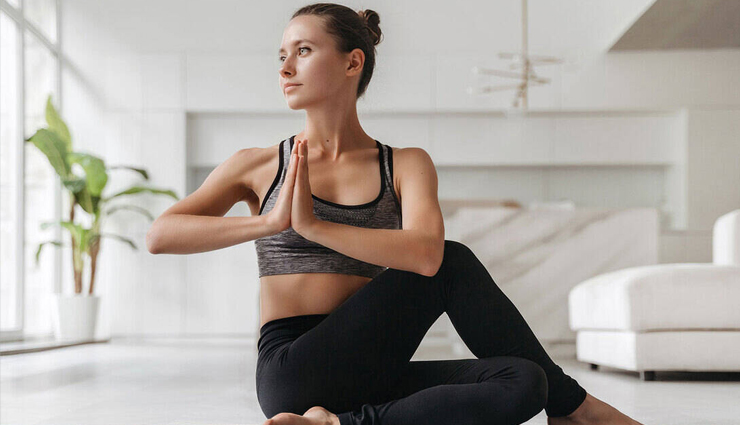
Did you know that incorporating certain yoga poses into your routine can enhance the radiance of your skin? Regular exercise already has numerous benefits for your skin, but specific yoga postures can take it a step further. If you're wondering whether yoga can truly give your face a luminous glow, experts say yes, it can. When combined with a nutritious diet and a healthy lifestyle, yoga has the potential to make your skin the center of attention.
Here are a few asanas (yoga poses) you can experiment with to eliminate toxins from your body and improve the health of your skin.
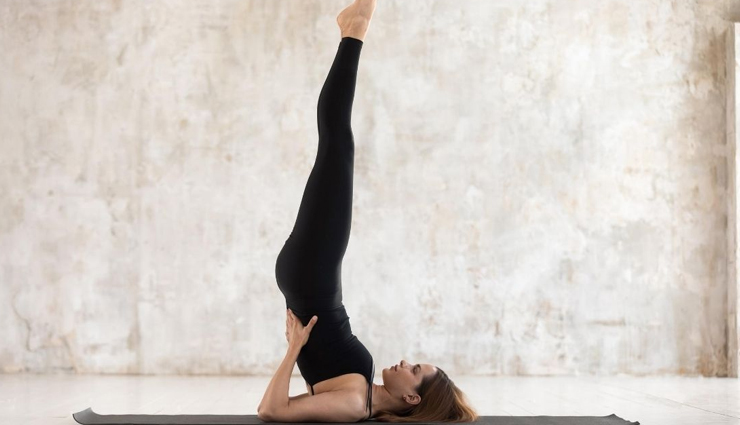
# Sarvangasana
Sarvangasana, also known as the Shoulder Stand pose, is a beneficial yoga posture for overall health and well-being. It requires balance, strength, and proper alignment. Here's a step-by-step guide on how to perform Sarvangasana:
- Begin by lying flat on your back with your legs extended and arms resting beside your body.
- Take a deep breath in, and as you exhale, engage your abdominal muscles to lift your legs off the ground, bringing them perpendicular to the floor.
- Support your hips and lower back with your hands, and continue to lift your legs upward.
- Press your hands into the floor, and use your core strength to lift your hips and lower back off the ground.
- Keep your legs straight and aligned with your torso, creating a straight line from your shoulders to your toes.
- Adjust your hands to provide additional support to your back, if necessary.
- Keep your neck relaxed and your gaze toward your toes or the ceiling, avoiding any strain on the neck.
- Maintain this position for a comfortable duration, breathing deeply and evenly.
- To come out of the pose, slowly lower your legs back down to the ground, vertebra by vertebra, while maintaining control.
Please note that Sarvangasana should be practiced under the guidance of a qualified yoga instructor, especially if you're a beginner. It is important to ensure proper alignment and to avoid any strain or injury. If you have any specific health concerns or conditions, consult with your healthcare provider before attempting this pose.
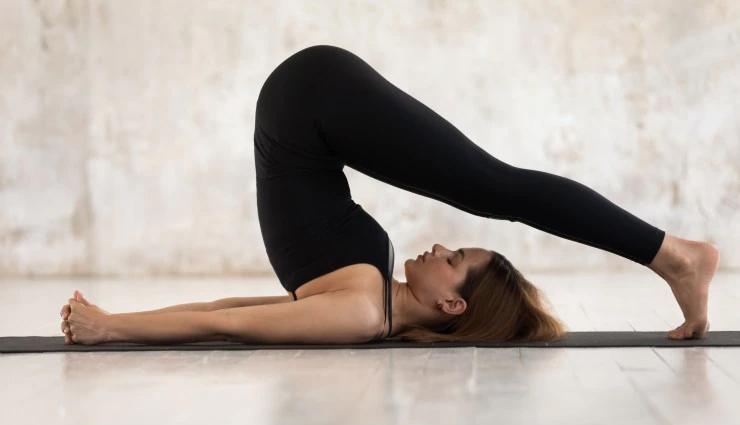
# Halasana
Halasana, also known as the Plow pose, is a yoga asana that involves forward folding and stretching the back of the body. It is a rejuvenating posture that can provide various benefits. Here's a step-by-step guide on how to perform Halasana:
- Begin by lying flat on your back with your arms resting beside your body and palms facing down.
- Take a deep breath in, and as you exhale, engage your core muscles and slowly lift your legs off the ground, bringing them perpendicular to the floor.
- Support your lower back with your hands and place them on your hips for stability.
- Inhale deeply, and as you exhale, use your abdominal muscles to lift your hips and lower back off the ground, rolling your legs overhead.
- Continue to lift your legs and hips until your toes touch the ground behind your head. Your legs should be straight and aligned with your torso.
- Keep your arms on the floor and your palms facing down. If you find it challenging to keep your legs straight, you can bend your knees slightly.
- Maintain this position and breathe deeply, allowing your back and spine to stretch.
- To come out of the pose, exhale and slowly roll your spine back down to the ground, one vertebra at a time, keeping your legs straight.
- Once your lower back and hips are back on the ground, release your hands from your hips and bring your arms alongside your body.
- Take a few breaths in a neutral position, allowing your body to relax.
It's important to note that Halasana should be practiced with caution, especially if you have any neck or back issues. If you're a beginner or have any concerns, it's advisable to practice under the guidance of a qualified yoga instructor. Listen to your body, and if you experience any pain or discomfort, come out of the pose immediately.
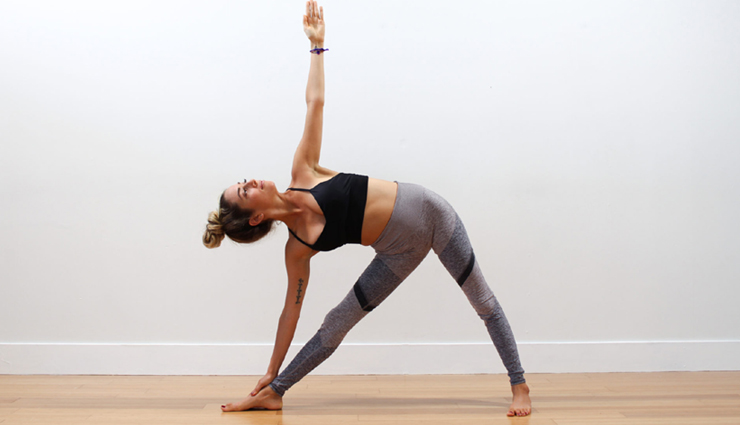
# Trikonasana
Trikonasana, also known as the Triangle pose, is a classic yoga asana that provides a deep stretch to the entire body, particularly the legs, hips, and torso. Here's a step-by-step guide on how to perform Trikonasana:
- Begin by standing upright at the top of your mat with your feet about hip-width apart.
- Step your feet wide apart, with your right foot turned out to the side and your left foot slightly angled inwards.
- Extend your arms out to the sides at shoulder height, parallel to the floor.
- Take a deep breath in, and as you exhale, shift your hips towards the right side as you lean your torso towards the right, keeping your spine straight.
- With your right hand, reach down towards your right shin, ankle, or the floor on the outside of your right foot. If you're more flexible, you can place your right hand on a block for support.
- Extend your left arm straight up towards the ceiling, aligning it with your shoulder. Your gaze can be directed towards your left hand or towards the ceiling, whichever is more comfortable for your neck.
- Maintain a strong foundation through both feet, pressing down evenly through the soles. Keep your legs engaged and avoid locking the knees.
- Ensure that your hips and chest are open, with your torso facing sideways rather than leaning forward or backward.
- Hold the pose for several deep breaths, feeling the stretch in your side body, hips, and legs.
- To come out of the pose, inhale and engage your core muscles as you press through your feet to rise back up to an upright position.
- Lower your arms to your sides and step your feet back together, returning to the starting position.
- Repeat the same steps on the other side, with your left foot turned out and your right foot angled inwards.
Remember to approach Trikonasana with awareness and respect for your body's limits. If you have any specific concerns or injuries, it's recommended to practice under the guidance of a qualified yoga instructor. Enjoy the stretch and the benefits of this rejuvenating pose!
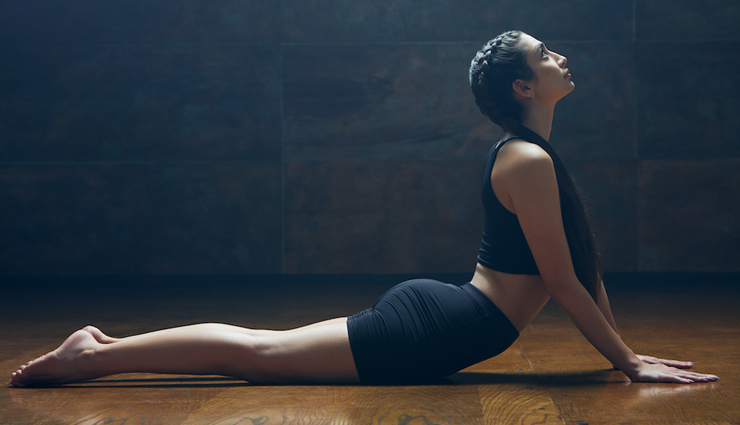
# Bhujangasana
Bhujangasana, also known as the Cobra pose, is a rejuvenating yoga asana that stretches the spine and opens the chest. It is often included in yoga sequences for its ability to strengthen the back muscles and improve posture. Here's a step-by-step guide on how to perform Bhujangasana:
- Start by lying flat on your stomach on a yoga mat or a comfortable surface.
- Place your palms on the mat, aligning them with your shoulders and keeping your elbows close to your body.
- Position your legs hip-width apart, with the tops of your feet resting on the mat.
- Take a deep breath in, and as you exhale, engage your core muscles and gently press your palms into the mat, lifting your head and chest off the ground.
- As you continue to inhale, use your back muscles to lift your upper body higher, while keeping your lower body grounded.
- Roll your shoulders back and down, away from your ears, and broaden your collarbones, opening your chest.
- Maintain a gentle curve in your lower back, avoiding excessive compression or strain.
- Keep your gaze forward or slightly upward, without straining your neck.
- Breathe deeply and comfortably in this position, feeling the stretch in your abdomen, chest, and spine.
- To release the pose, exhale and slowly lower your chest and head back down to the mat, returning to the starting position.
- Rest for a few moments in a relaxed position, allowing your body to integrate the effects of the pose.
It's important to note that if you have any specific back or neck injuries or conditions, it's advisable to practice Bhujangasana under the guidance of a qualified yoga instructor. Listen to your body and modify the pose as needed to suit your comfort and ability level. Enjoy the benefits of this invigorating backbend!
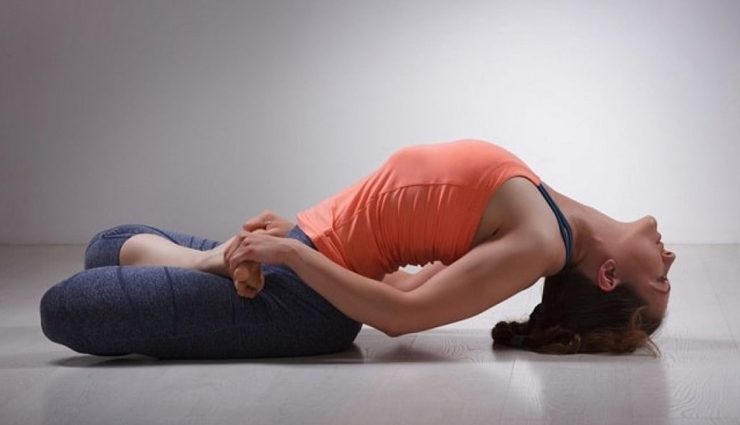
# Matsyasana
Matsyasana, also known as the Fish pose, is a yoga asana that provides a deep stretch to the chest, shoulders, and neck while energizing the body. Here's a step-by-step guide on how to perform Matsyasana:
- Start by lying flat on your back on a yoga mat or a comfortable surface.
- Place your arms alongside your body, palms facing down.
- Bend your knees and place your feet flat on the mat, keeping them hip-width apart.
- Slide your hands, palms facing down, under your buttocks, positioning them as close to your body as possible.
- As you inhale, press your forearms and elbows firmly into the mat and lift your chest off the ground.
- Arch your back and tilt your head backward, allowing the crown of your head to rest lightly on the mat.
- Keep your weight supported on your elbows and forearms, not on your head or neck.
- Relax your neck and allow your throat and chest to open up.
- Engage your legs and press the tops of your feet and thighs into the mat.
- Take slow, deep breaths, feeling the stretch in your chest, shoulders, and neck.
- Hold the pose for several breaths, enjoying the stretch and the opening in your upper body.
- To come out of the pose, gently lower your chest and head back down to the mat, releasing the stretch.
- Slide your hands out from under your buttocks and rest them alongside your body.
- Extend your legs out straight, relaxing in Savasana (corpse pose) for a few moments.
As with any yoga pose, it's important to listen to your body and modify the pose as needed. If you have any specific neck or back injuries or conditions, it's advisable to practice Matsyasana under the guidance of a qualified yoga instructor. Enjoy the benefits of this heart-opening pose!


