- Home›
- Healthy Living›
- International Yoga Day 2024: 5 Yoga Poses To Manage Your Blood Pressure
International Yoga Day 2024: 5 Yoga Poses To Manage Your Blood Pressure
By: Priyanka Maheshwari Fri, 21 June 2024 08:56:13

Every year on June 21st, people around the world come together to celebrate International Yoga Day. It’s a time to appreciate the profound benefits of yoga for our overall health and well-being. Yoga isn't just about flexibility or relaxation; it’s a holistic practice that offers natural and effective ways to manage various health conditions, including high blood pressure.
High blood pressure, also known as hypertension, is a widespread health issue that can lead to serious complications if not properly managed. Fortunately, yoga provides gentle and supportive techniques to help control it. This article introduces you to 5 yoga poses that can assist in keeping your blood pressure in check, promoting a healthier heart and cardiovascular system.
Incorporating these yoga poses into your daily routine can be a proactive step towards maintaining healthy blood pressure levels. Embrace the power of yoga to take charge of your health, and enjoy the balance and vitality it brings to your life.

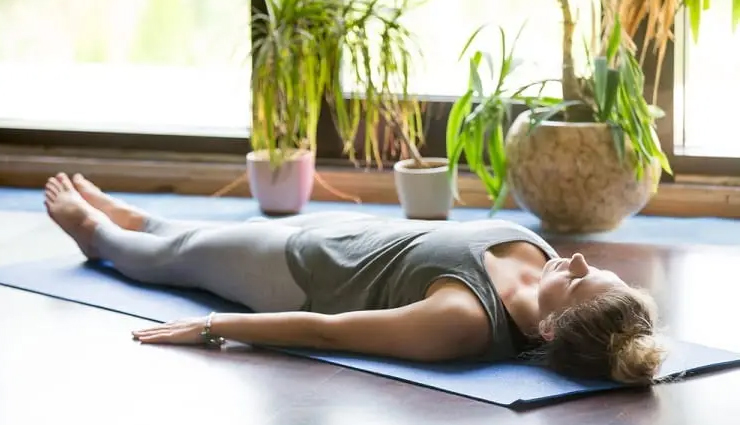
# Savasana (Corpse Pose)
- Start by lying down on your back on a yoga mat or a comfortable surface. Make sure your body is in a straight line, and your legs are slightly apart. Allow your feet to relax and fall outward naturally.
- Place your arms alongside your body with your palms facing upward. Allow your fingers to gently curl in a relaxed manner. Keep your shoulders relaxed and away from your ears.
- Softly close your eyes and allow your eyelids to feel heavy. This helps in turning your attention inward and promoting a sense of relaxation.
- Starting from the top of your head, consciously release any tension you may be holding in your body. Relax your forehead, eyebrows, cheeks, and jaw. Let your shoulders and arms feel heavy and relaxed. Soften your abdomen, release any tension in your hips, and let your legs and feet fully relax.
-: Bring your attention to your breath. Notice the natural rhythm of your breath as it flows in and out of your body. Feel the gentle rise and fall of your abdomen with each breath.
- As you rest in Savasana, thoughts may arise in your mind. Acknowledge them without judgment, and then let them go. Bring your focus back to your breath and the sensation of relaxation in your body.
- Allow yourself to remain in Savasana for at least 5 to 10 minutes or longer, depending on your preference and the time available. Let your body and mind experience a deep state of relaxation and rejuvenation.
- When you're ready to end the pose, begin to deepen your breath. Gradually wiggle your fingers and toes, stretch your arms overhead, and take a long, full-body stretch. Roll to one side and use your arm to support your head. Take a few breaths in this fetal position before slowly sitting up.

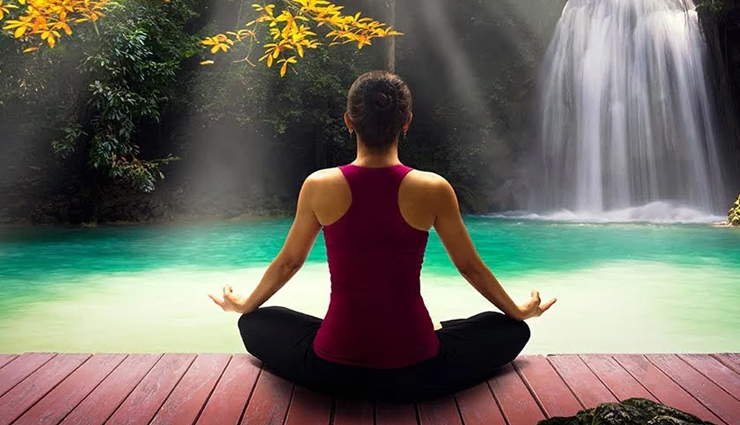
# Sukhasana (Easy Pose)
- Start by sitting on a yoga mat or a cushion. Cross your legs at the shins and bring your feet comfortably in front of your pelvis. Allow your knees to fall outward, creating a triangle shape with your legs.
- Sit with an upright and elongated spine. Imagine a string pulling the crown of your head upward, lengthening your spine. This helps in maintaining a balanced and centered posture.
- Let your shoulders roll back and down, allowing them to be relaxed and away from your ears. This helps open up your chest and promote a sense of ease in your upper body.
- Place your hands on your knees or thighs. You can choose to have your palms facing up for a receptive energy or down for a grounding energy. Find a position that feels natural and comfortable for you.
- Soften your facial muscles, including your forehead, eyes, cheeks, and jaw. Allow your facial expression to be calm and relaxed.
- Lengthen the back of your neck, imagining your head floating upward. This helps in maintaining a neutral alignment and reducing strain in the neck area.
- Close your eyes if it feels comfortable for you. If you prefer to keep your eyes open, gently gaze downward and focus on a fixed point on the ground in front of you.
- Bring your attention to your breath. Take slow, deep breaths, inhaling and exhaling fully. Feel the natural flow of your breath and let it anchor you in the present moment.
- Allow yourself to relax into the posture, feeling grounded and centered. Be present in the moment, observing your breath and sensations in your body without judgment.
- Stay in Sukhasana for a few minutes or as long as you feel comfortable. Use this time to practice meditation, pranayama (breathing exercises), or simply enjoy a sense of stillness and tranquility.

Uttanasana (Standing Forward Bend):
- Stand tall with your feet hip-width apart and arms by your sides. Ground down through your feet, engage your leg muscles, and lengthen your spine.
- On an exhale, slowly hinge forward from your hips. Keep your spine long as you fold, leading with your chest and allowing your head and neck to relax. Bend your knees slightly if needed to maintain a gentle stretch.
- Allow your upper body to hang loosely and relax. Let your arms dangle down towards the ground. If it feels comfortable, you can hold onto opposite elbows or gently cup your elbows with your hands.
- Release any tension in your neck and shoulders. Let your head hang heavy, feeling a gentle stretch through the back of your neck. Allow your shoulders to soften and roll forward.
- If you feel tightness in your hamstrings or lower back, you can further bend your knees to make the pose more accessible. The focus should be on creating length and space in the spine rather than reaching for the floor.
- Take slow and deep breaths in this pose. As you inhale, feel your spine lengthen and expand. As you exhale, allow your body to relax deeper into the forward fold.
- Stay in Uttanasana for several breaths or as long as it feels comfortable for you. With each breath, try to release any tension you may be holding in your body and surrender to the pose.
- To come out of Uttanasana, engage your core muscles and inhale as you slowly lift your torso back up to a standing position. Keep your spine long as you rise, and allow your head to come up last.

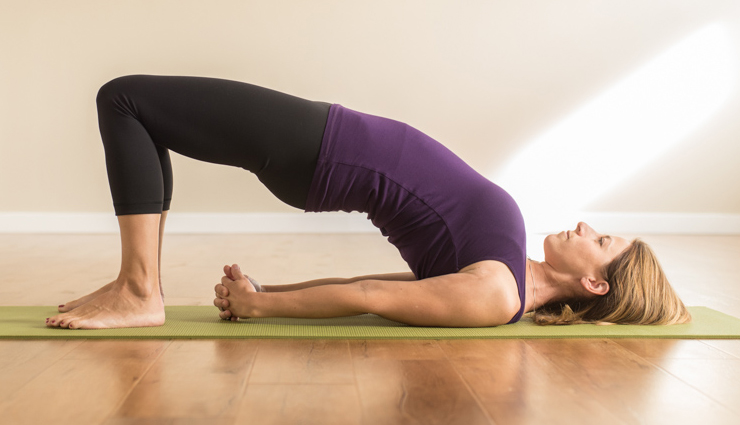
Setu Bandhasana (Bridge Pose):
- Lie down on a yoga mat or a comfortable surface with your knees bent and feet hip-width apart. Place your arms alongside your body, palms facing down.
- Ensure that your feet are parallel to each other and close to your sitting bones. Your heels should be a comfortable distance away from your glutes.
- Press your feet firmly into the mat as you engage your core muscles. Allow your shoulders to relax down and away from your ears, finding a natural, relaxed position.
- On an inhale, slowly lift your hips off the ground by pressing through your feet. Keep your weight evenly distributed across your feet and shoulders. As you lift, your thighs should move toward your torso.
- If you can, interlace your fingers underneath your body, rolling your shoulders closer together. If interlacing your fingers is challenging, you can keep your arms alongside your body and use a yoga block or a folded blanket under your sacrum for support.
- Roll your shoulders back and down, opening your chest towards the sky. Keep your chin slightly tucked in and your neck relaxed. Gaze softly towards your chest or look straight ahead.
- Take slow, deep breaths as you hold the pose. Allow your body to relax into the shape of the bridge, finding stability and ease. Hold the pose for several breaths or as long as it feels comfortable for you.
- To come out of Setu Bandhasana, gently release your interlaced fingers or remove any props from under your sacrum. Lower your hips back down to the ground with control, vertebra by vertebra, and return to a lying position.

# Anulom Vilom Pranayama (Alternate Nostril Breathing)
- Sit in a cross-legged position or on a chair with your spine erect. Rest your hands on your knees or thighs with palms facing upward. Close your eyes and take a few deep breaths to relax.
- Bring your right hand in front of your face and place your index and middle fingers gently between your eyebrows. Rest your thumb on your right nostril and your ring finger on your left nostril.
- Use your right thumb to gently close your right nostril. Take a deep breath in through your left nostril. Inhale slowly and deeply, filling your lungs with air.
- Release your right nostril and use your ring finger to gently close your left nostril. Exhale slowly and completely through your right nostril.
- Keep your left nostril closed and inhale deeply through your right nostril. Fill your lungs with air, allowing your abdomen to expand.
- Release your left nostril and use your right thumb to gently close your right nostril. Exhale slowly and completely through your left nostril.
- Inhale through your left nostril, close it with your ring finger, and exhale through your right nostril. Then inhale through your right nostril, close it with your thumb, and exhale through your left nostril. This completes one round.
- Repeat the cycle of inhaling and exhaling through alternate nostrils for about 5 to 10 minutes, gradually increasing the duration as you become more comfortable with the practice. Maintain a slow and steady rhythm, focusing on the smoothness of your breath.
- After completing the desired number of rounds, release your hand and place it back on your knee or thigh. Take a few normal breaths, allowing your breathing to return to its natural state. Observe any sensations in your body and the calmness of your mind.
Note: Remember to practice these poses mindfully, listen to your body, and never force any movements beyond your comfort level.


