- Home›
- Healthy Living›
- 7 Must Try Yoga Asanas To Treat Varicose Veins
7 Must Try Yoga Asanas To Treat Varicose Veins
By: Priyanka Maheshwari Mon, 18 Sept 2023 12:29:09
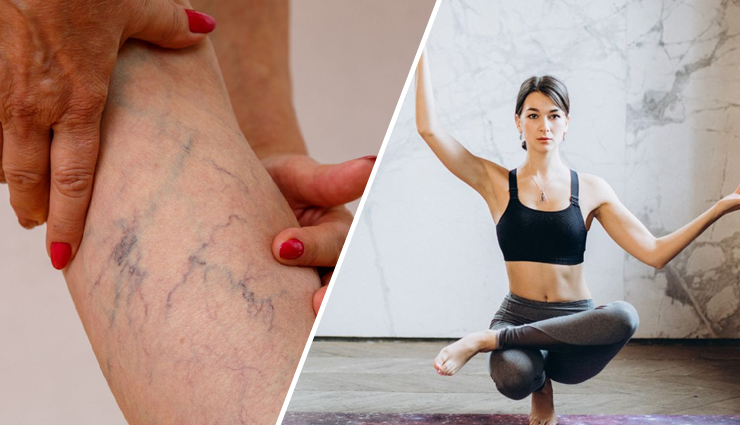
If you've noticed the emergence of unsightly, twisted, and swollen veins known as varicose veins on your limbs, it's important to take action. Fortunately, there is a solution available. You can effectively address varicose veins and enhance your overall well-being by practicing specific yoga poses. In this article, we will explore the nature of varicose veins, their potential health consequences, and introduce you to the top seven yoga poses that can aid in treating this condition and promoting holistic healing. Continue reading to gain a deeper understanding!
Varicose veins are enlarged, twisted, and swollen veins that typically appear in the legs and feet. They occur when the veins become weakened or damaged, leading to a pooling of blood within the affected veins. This pooling of blood causes the veins to bulge and take on a visibly twisted and often bluish or purplish appearance.
The primary cause of varicose veins is faulty valves within the veins. Veins have one-way valves that help blood flow upward toward the heart. When these valves weaken or fail to function properly, blood can flow backward and collect in the veins, leading to their enlargement and distortion.
Varicose veins are a common condition, and they can be both a cosmetic concern and a source of discomfort. Common symptoms include pain, aching, heaviness, and swelling in the legs, especially after prolonged periods of standing or sitting. In severe cases, varicose veins can lead to more serious complications like skin ulcers or blood clots.
Various factors can contribute to the development of varicose veins, including genetics, age, pregnancy, obesity, and a sedentary lifestyle. Treatment options range from lifestyle changes and compression stockings to medical procedures like vein stripping or laser therapy, depending on the severity of the condition.
# Tadasana
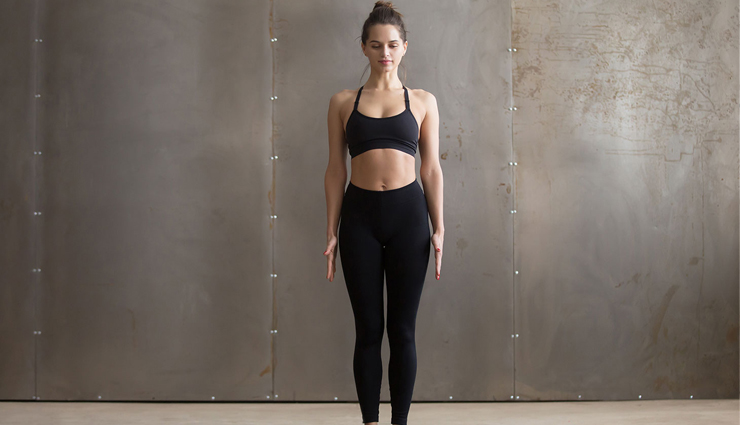
- Start by standing on your yoga mat with your feet together. Ensure that your toes are touching and your heels are slightly apart, creating a small gap between your heels.
- Distribute your body weight evenly across both feet, feeling the balance between the front, back, and sides of your feet.
- Engage your leg muscles by lifting your kneecaps slightly. Ensure that your legs are active but not rigid.
- Lengthen your tailbone downward toward the floor, creating a neutral position for your pelvis.
- Draw your abdominal muscles gently inward to support your lower back.
- Roll your shoulders back and down, allowing your chest to open. Keep your chest broad, but don't over-arch your lower back.
- Extend your arms alongside your body with your palms facing inward. Relax your arms and fingers.
- Keep your chin parallel to the floor, and align your head so that the back of your neck is in line with your spine.
- Gaze softly forward, fixing your gaze on a point in front of you to help with balance.
- Breathe deeply and evenly through your nose. Feel your ribcage expand with each inhale, and exhale fully.
- Stand tall in Tadasana, imagining that you are a mountain—solid, stable, and grounded. Focus on your breath and the sensation of being rooted to the earth.
- Hold Tadasana for 30 seconds to 1 minute or as long as is comfortable. It can also be used as a starting point for transitioning into other yoga poses.
- To release the pose, exhale and relax your arms by your sides. You can shake out your legs if needed before moving on to the next pose.
# Uttanasana
- Start by standing in Tadasana (Mountain Pose) with your feet hip-width apart. Ensure that your weight is evenly distributed across both feet.
- Inhale deeply and engage your core muscles.
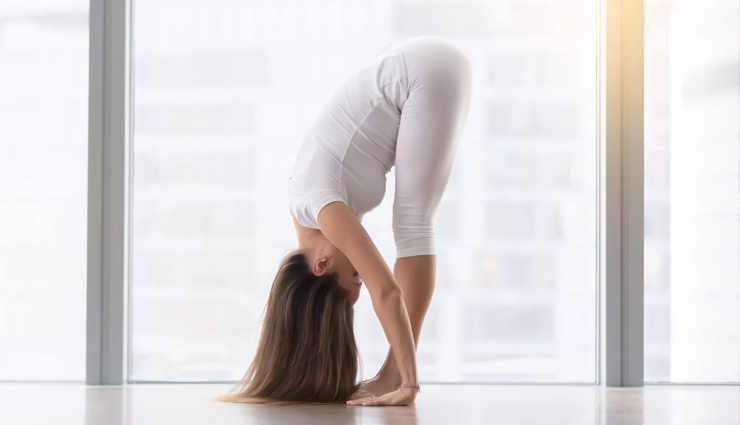
- Exhale slowly and begin to hinge at your hips, allowing your torso to fold forward over your legs. Keep your spine long as you fold.
- As you fold forward, keep your knees straight, but avoid locking them. If you have tight hamstrings, it's okay to have a slight bend in your knees to prevent strain.
- Let your arms hang down toward the floor, with your hands either resting on the floor, your shins, or your ankles, depending on your flexibility.
- Relax your neck and let your head hang heavy. Your gaze should be directed toward your legs or the floor.
- If possible, bring your chest closer to your thighs with each exhale, deepening the stretch in your hamstrings and lower back.
- Breathe deeply and hold Uttanasana for 30 seconds to 1 minute, or as long as is comfortable. Continue to breathe and relax into the pose.
- To release the pose, inhale and engage your core muscles. Slowly roll your spine up one vertebra at a time, keeping your head and neck relaxed until you are standing upright in Tadasana.
- Take a moment to stand in Tadasana and notice the effects of the pose on your body and breath.
# Navasana
- Start by sitting on your yoga mat with your legs extended straight in front of you.
- Place your hands on the mat just behind your hips, fingers pointing toward your feet. Press your palms firmly into the mat to help lift your chest and lengthen your spine.
- Bend your knees, and bring your feet closer to your buttocks, keeping your feet flat on the mat. Your knees should be pointing up.
- Engage your core muscles by drawing your navel in toward your spine.
- On an inhale, lean back slightly, balancing on your sit bones while lifting your feet off the mat. Your shins should now be parallel to the floor.
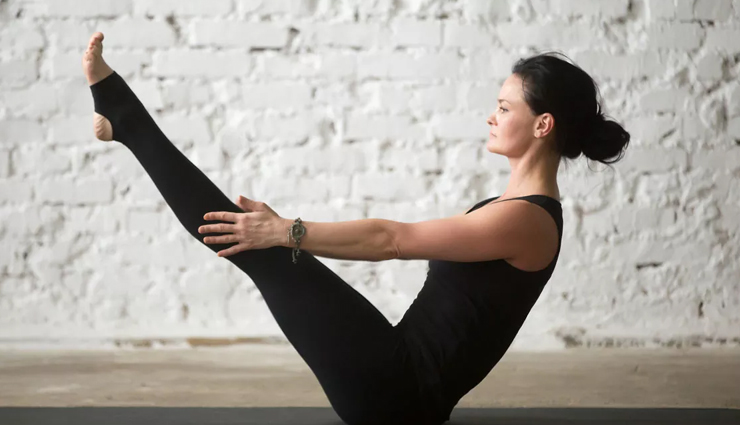
- As you continue to lift, straighten your legs, keeping them at a 45-degree angle to the floor. Your body will form a V shape, balancing on your sit bones.
- Extend your arms forward alongside your legs, parallel to the floor. Keep your fingers pointing forward and your palms facing each other.
- Keep your chest open and your spine long. Avoid rounding your back or collapsing your chest.
- Find your balance in Navasana by engaging your core muscles and lifting your chest. Focus your gaze on a point in front of you to help with balance.
- Breathe deeply and hold Navasana for 15 to 30 seconds or as long as is comfortable. As you gain strength and flexibility, you can gradually increase the duration.
- To release the pose, exhale and lower your feet and torso back to the mat, returning to a seated position with your legs extended.
- Take a moment to rest and breathe before repeating the pose for another round.
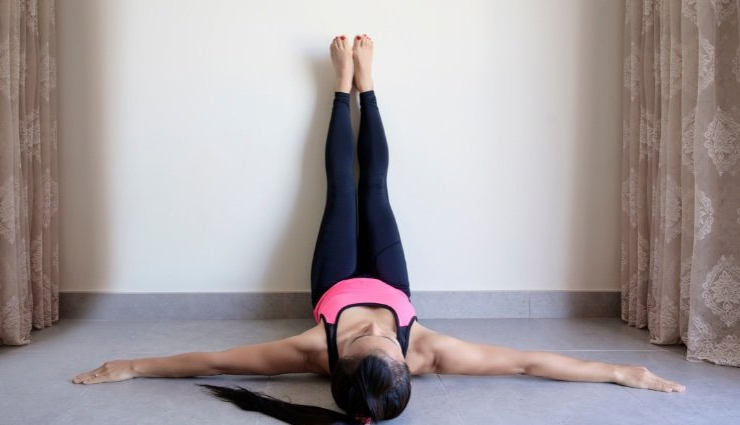
# Viparita Karani
- Find a clear wall space in a quiet, calm area. You may want to use a yoga mat or place a folded blanket or cushion near the wall for extra comfort.
- Sit sideways with your right hip and shoulder touching the wall.
- Bend your knees and gently lower your upper body down to the mat while simultaneously swinging your legs up the wall. Your buttocks should come close to the wall.
- As you lower your upper body and extend your legs up the wall, ensure that your legs are straight and your feet are flexed, toes pointing toward the ceiling.
- Scoot your hips as close to the wall as is comfortable. Your sitting bones should be touching or very close to the wall.
- Allow your arms to rest comfortably by your sides with your palms facing up. Your arms can also be positioned in a "cactus" shape with your elbows bent at 90 degrees if that feels more comfortable.
- Close your eyes, relax your facial muscles, and focus on your breath.
- Breathe deeply and evenly, feeling the gentle stretch in the back of your legs and the relaxation of your lower back.
- Relax in Viparita Karani for 5 to 15 minutes, or as long as you like. It's a deeply calming and restorative pose.
- When you're ready to exit the pose, bend your knees, roll onto one side, and use your hands to help you sit up slowly.
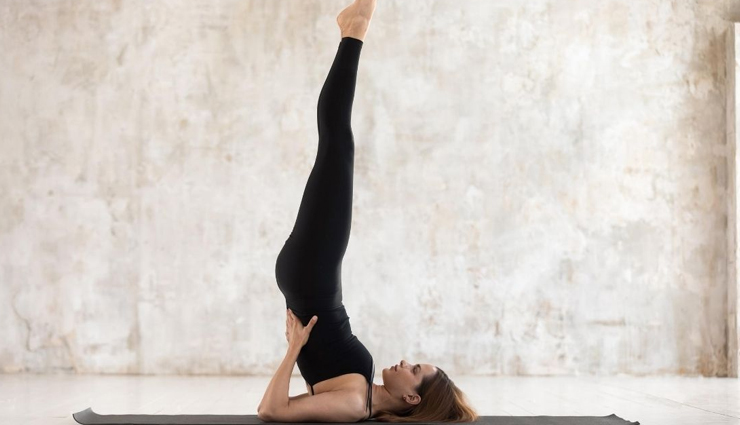
# Sarvangasana
- Start by lying flat on your back on a yoga mat with your legs extended straight and your arms alongside your body, palms facing down.
- Engage your core muscles and press your palms into the mat.
- Inhale deeply, and as you exhale, lift your legs and lower back off the mat, bringing your knees toward your chest.
- Continue to lift your legs and lower back, using your hands to support your lower back as you do so. Your weight should be on your shoulders, not your neck or head.
- Straighten your legs upward toward the ceiling, forming a straight line from your shoulders to your feet. Keep your toes pointed.
- Support your back with your hands, placing your hands on your lower back with your fingers pointing upward. Your elbows should be shoulder-width apart.
- Your body should now be perpendicular to the floor, balancing on your shoulders. Keep your neck relaxed, and avoid turning your head.
- Engage your leg muscles and point your toes to maintain balance.
- Breathe deeply and steadily while holding Sarvangasana for 30 seconds to 1 minute, or as long as is comfortable. Focus on your breath and maintaining a straight line with your legs.
- To release the pose, exhale and slowly lower your legs and lower back down to the mat, one foot at a time, while continuing to support your lower back with your hands.
- Once your feet are on the mat, release your hands from your lower back and rest in Corpse Pose (Shavasana) for a few moments to relax.
Precautions:
- Sarvangasana is considered an advanced yoga pose and should be approached with caution. If you're new to yoga or have any neck or shoulder issues, it's advisable to practice this pose under the guidance of an experienced yoga instructor.
- Avoid practicing Sarvangasana if you have high blood pressure, heart conditions, glaucoma, or if you are menstruating.
- Make sure your neck is free of injury or discomfort before attempting this pose.
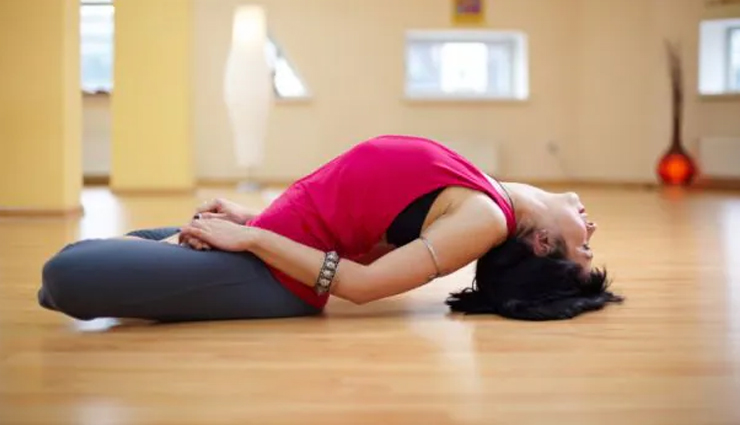
# Matsyasana
- Start by sitting on your yoga mat with your legs extended straight in front of you.
- Place your hands on the mat beside your hips, with your fingers pointing toward your feet.
- Bend your elbows and press your forearms and palms firmly into the mat.
- As you inhale, engage your core muscles and lean back slightly, balancing on your sitting bones. Your forearms and elbows should support your weight.
- Carefully arch your back and lift your chest toward the ceiling. Allow your head to gently fall backward, with the crown of your head resting on the mat. Your neck should be comfortable, and there should be no strain.
- Lift your chest as high as you can comfortably, creating a deep arch in your upper back.
- If your neck allows, you can lift your head slightly off the mat, but avoid putting excessive pressure on the neck.
- Point your toes and press the tops of your feet into the mat, keeping your legs active and engaged.
- Breathe deeply and evenly in Matsyasana, holding the pose for 15 to 30 seconds or as long as is comfortable.
- To release the pose, gently lower your chest and head back down to the mat, and then sit up straight.
- Take a moment to relax and breathe before moving on to your next pose.
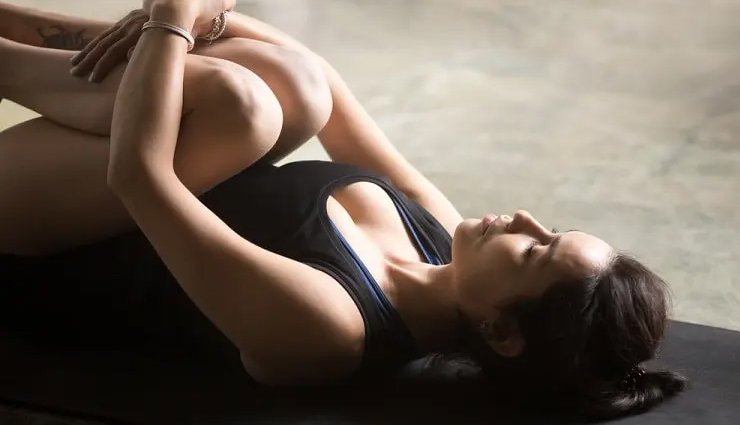
# Pawanmuktasana
- Start by lying flat on your back on a yoga mat with your legs extended straight and your arms resting alongside your body, palms facing down.
- Take a few deep breaths to relax and center yourself.
- On an exhale, bend your right knee and draw it toward your chest. Hug your knee with both hands, interlocking your fingers just below the knee joint.
- Keep your left leg extended straight on the mat, engaging the muscles in your left thigh.
- As you hug your right knee to your chest, gently lift your head and shoulders off the mat, bringing your nose toward your knee. Keep your neck relaxed, and avoid straining.
- Breathe deeply and hold the pose for 15 to 30 seconds, or as long as is comfortable. Focus on the sensation of compression in the abdomen.
- Exhale and release your right leg, lowering your head and shoulders back to the mat.
- Repeat the pose on the other side by bending your left knee and hugging it to your chest, lifting your head and shoulders if comfortable.
- After completing both sides, you can do a variation of the pose by hugging both knees to your chest simultaneously. This is often referred to as "Double Pawanmuktasana."


