- Home›
- Healthy Living›
- 7 Must Try Yoga Poses To Treat Sinusitis
7 Must Try Yoga Poses To Treat Sinusitis
By: Priyanka Maheshwari Mon, 18 Sept 2023 1:35:06
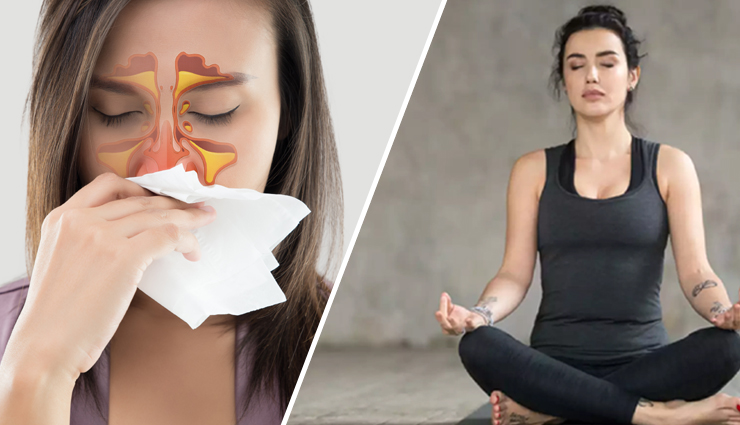
Sinusitis is a common medical condition that affects millions of people worldwide. It is an inflammation or infection of the sinuses, which are the hollow air-filled spaces located within the bones of the face and skull. These sinuses are lined with a mucous membrane that produces mucus to help moisturize the air we breathe and trap foreign particles like dust and bacteria.
When the sinuses become inflamed or infected, they can cause a range of uncomfortable symptoms. Sinusitis can be acute, lasting for a short period, or chronic, lasting for an extended duration, typically more than 12 weeks. It can affect people of all ages and backgrounds and may result from various causes, including viral or bacterial infections, allergies, nasal polyps, or structural issues in the nose and sinuses.
The most common symptoms of sinusitis include facial pain or pressure, nasal congestion, a runny or stuffy nose, loss of smell, cough, and postnasal drip. These symptoms can significantly impact a person's quality of life, causing discomfort and affecting their ability to breathe and sleep properly.
Sinusitis can often be managed with conservative treatments like rest, hydration, and over-the-counter medications. In some cases, antibiotics may be necessary to treat bacterial infections. For chronic or severe cases, surgery may be recommended to address structural issues or remove nasal polyps.
Proper diagnosis and management of sinusitis are essential to alleviate symptoms and prevent complications. If you or someone you know is experiencing persistent sinus problems, it's advisable to seek medical attention from a healthcare professional who can provide an accurate diagnosis and recommend an appropriate treatment plan.
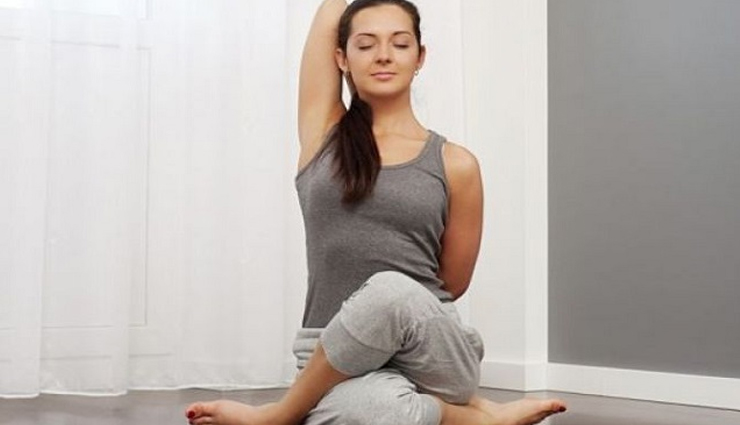
# Gomukhasana
- Start by sitting on a yoga mat with your legs extended straight in front of you.
- Bend your knees and bring your feet flat on the mat, hip-width apart.
- Slide your right foot under your left knee, positioning it close to your left hip. Your right knee should be pointing forward, and your right heel should be to the outside of your left hip.
- Cross your left leg over your right knee, placing your left foot on the outside of your right hip. Your left knee should be pointing forward, and your left heel should be to the outside of your right hip.
- Adjust your position so that your sitting bones are evenly grounded on the mat.
- Inhale, and as you exhale, reach your right arm out to the side and then bend your elbow to bring your hand behind your back. Your right hand should be reaching up your back, palm facing outward.
- Inhale again, and this time, raise your left arm up toward the ceiling.
- Exhale, and bend your left elbow, bringing your left hand down your back, palm facing inward.
- Try to connect your hands behind your back. If your hands don't meet, you can use a strap or a cloth to hold onto, allowing your hands to work closer together over time.
- Once you have your hands connected or are holding onto a strap, gently draw your elbows toward each other and lift your chest. This action will create a stretch in your shoulders and chest.
- Keep your spine long and your neck relaxed. Your gaze can be forward or slightly upward.
- Breathe deeply and hold Gomukhasana for 30 seconds to 1 minute, or as long as is comfortable. Focus on maintaining the stretch in your shoulders and chest while keeping your breath steady.
- To release the pose, gently release your hands, straighten your legs, and return to a comfortable seated position.
- Repeat the pose on the other side, switching the position of your legs and arms.
Gomukhasana is a wonderful yoga pose for opening the chest and shoulders while also stretching the hips and thighs. Regular practice can help improve posture and reduce tension in the upper body.
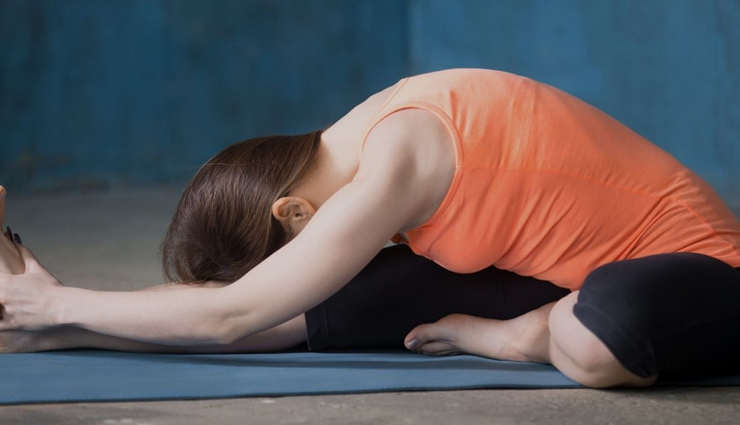
# Janu Sirsasana
- Begin by sitting on your yoga mat with your legs extended straight in front of you.
- Bend your right knee and bring the sole of your right foot to the inside of your left thigh. Your right knee should be open to the side, and your right foot should be close to your left inner thigh.
- Keep your left leg extended straight, with your toes pointing up toward the ceiling. Flex your left foot to engage the muscles in your left leg.
- Sit up tall, lengthening your spine. Ensure that both sitting bones are grounded evenly on the mat.
- Inhale, and as you exhale, rotate your upper body slightly to the left, so your chest is facing the extended left leg.
- On an exhale, hinge at your hips and begin to fold forward over your left leg. Keep your spine long as you fold.
- Reach your hands toward your left foot or shin. If you can't reach your foot, that's okay; you can hold onto your ankle, calf, or use a yoga strap around your foot for support.
- Avoid rounding your back. Instead, keep your back as straight as possible, leading with your chest.
- Keep your neck in a neutral position, gazing toward your extended left foot.
- Breathe deeply and hold the forward bend for 30 seconds to 1 minute, or as long as is comfortable. Feel the stretch along the back of your left leg.
- To release the pose, inhale, engage your core, and slowly lift your torso back up to a seated position.
- Straighten your bent right leg and extend it alongside your left leg.
- Repeat the pose on the other side by bending your left knee and bringing your left foot to the inside of your right thigh.
Janu Sirsasana is a gentle stretch for the hamstrings and lower back, and it also provides a nice release for the hip flexors. Regular practice can help improve flexibility in the legs and relieve tension in the lower back.
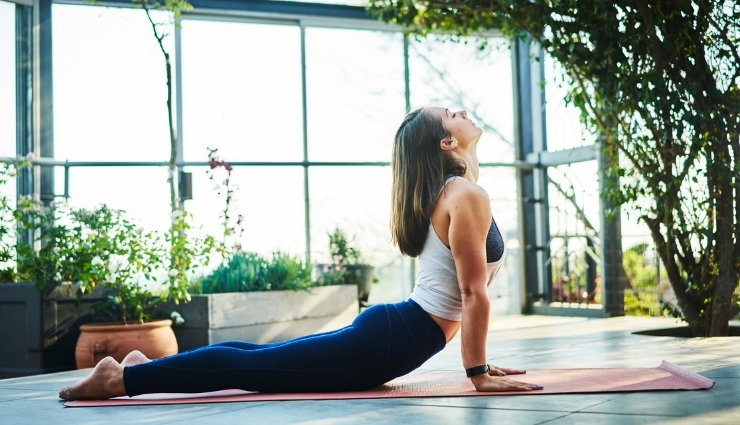
# Bhujangasana
- Start by lying flat on your stomach on a yoga mat with your legs extended straight behind you. Your toes should be pointing away from your body, and your feet should be hip-width apart.
- Place your palms on the mat, slightly below your shoulders, and spread your fingers wide. Your elbows should be close to your body, pointing backward.
- As you inhale, press your palms into the mat and slowly begin to lift your head, chest, and upper abdomen off the mat. Keep your lower abdomen, pelvis, and legs firmly grounded.
- Continue to lift your upper body, using the strength of your back muscles, not your arms, to create the arch in your spine.
- Keep your gaze forward or slightly upward, avoiding any strain on your neck. Your neck should remain in a neutral position.
- Ensure that your shoulders are relaxed, away from your ears, and that your elbows are slightly bent.
- Breathe deeply and evenly in the pose, feeling the stretch and expansion in your chest.
- Hold Bhujangasana for 15 to 30 seconds, or as long as is comfortable. Focus on your breath and maintaining a gentle arch in your back.
- To release the pose, exhale and gently lower your upper body back down to the mat. Rest your forehead on the mat and turn your head to one side to relax for a moment.
- You can repeat Bhujangasana for another round if desired.
Bhujangasana is an excellent pose for strengthening the back muscles, improving flexibility in the spine, and opening up the chest and lungs for better breathing. It's often used as part of a yoga sequence to prepare the body for deeper backbends.
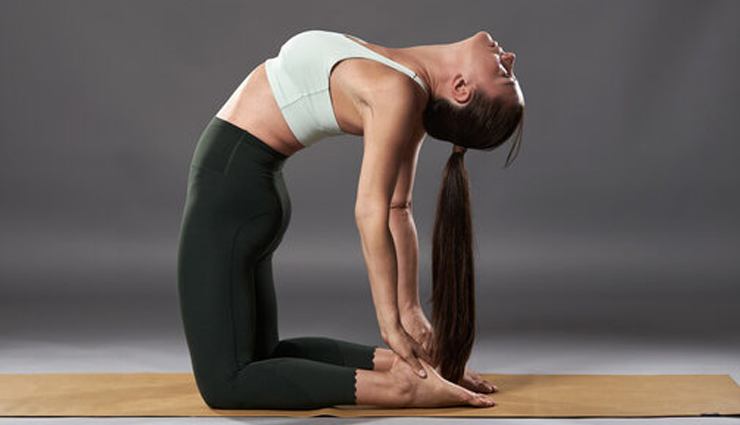
# Ustrasana
- Begin by kneeling on your yoga mat with your knees hip-width apart. Your thighs should be perpendicular to the mat, and your shins and the tops of your feet should be resting on the floor.
- Place your hands on your lower back with your fingers pointing downward. Your palms should be resting on your sacrum, fingers pointing toward your tailbone. This hand placement provides support for your lower back.
- Inhale deeply and engage your core muscles.
- Exhale and begin to lean back, gently arching your spine. Keep your pelvis and hips aligned over your knees as you start to move backward.
- Continue to lean back slowly, feeling the stretch in your chest and abdomen. As you do this, start to reach for your heels with your hands.
- Once you have reached your heels, grasp them with your hands. Your thumbs should be on the outside of your feet, and your fingers should be on the soles of your feet. If you can't reach your heels comfortably, you can keep your hands on your lower back for support.
- Keep your neck in a neutral position or allow your head to drop back gently, opening your throat.
- Keep your thighs vertical and perpendicular to the mat. Avoid pushing your hips forward beyond your knees.
- Breathe deeply and hold Ustrasana for 15 to 30 seconds, or as long as is comfortable. Maintain a steady breath, and focus on the stretch and openness in your chest.
- To release the pose, exhale and bring your hands back to your lower back for support. Slowly lift your torso back to an upright position.
- Sit on your heels for a moment, rest, and take a few deep breaths.
Ustrasana is known for its benefits in improving posture, opening the chest, and stretching the front of the body. It can also help alleviate mild backaches and improve flexibility in the spine. Be cautious when practicing Ustrasana, especially if you have any neck or lower back issues.
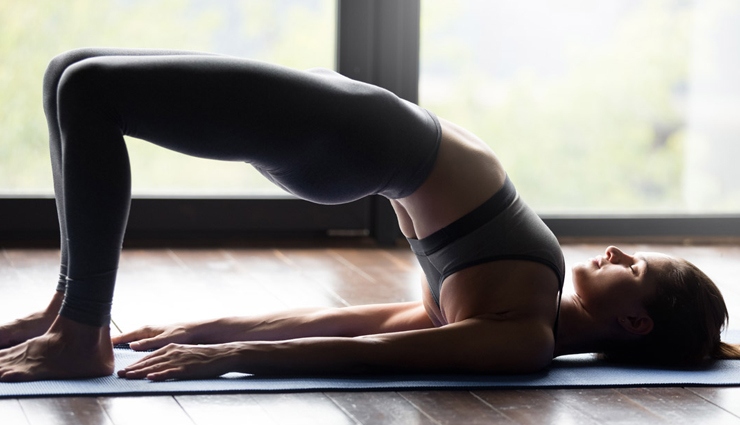
# Setu Bandha Sarvangasana
- Start by lying on your back on a yoga mat with your knees bent and your feet flat on the mat. Your feet should be hip-width apart, and your arms should be resting alongside your body, palms facing down.
- Ensure that your feet are close to your buttocks, with your heels a few inches away from your sitting bones.
- Inhale deeply, and as you exhale, engage your core muscles and press your feet firmly into the mat.
- On your next exhale, begin to lift your hips off the mat. At the same time, roll your spine off the mat, starting with the lower back and moving upward. Your weight should be on your shoulders, upper back, and feet.
- Keep your knees in line with your hips, and avoid letting them splay outward or inward.
- Continue to lift your hips and lower back until your thighs are approximately parallel to the mat. Your body should form a diagonal line from your shoulders to your knees.
- Interlace your fingers under your body, and roll your shoulders under to create a firm foundation for your hands. Your arms should be straight and your elbows close together.
- Press down through your arms and shoulders to lift your chest slightly and open your heart. Keep your neck relaxed, and avoid turning your head.
- Breathe deeply and hold Setu Bandha Sarvangasana for 30 seconds to 1 minute, or as long as is comfortable. Focus on lifting your hips and maintaining a strong foundation through your feet and shoulders.
- To release the pose, gently unclasp your hands and lower your spine and hips back down to the mat one vertebra at a time.
- Rest in Corpse Pose (Shavasana) for a few breaths to relax your body.
Setu Bandha Sarvangasana is an excellent pose for strengthening the lower back, buttocks, and legs while opening up the chest and shoulders. It can also help relieve mild backaches and improve posture.
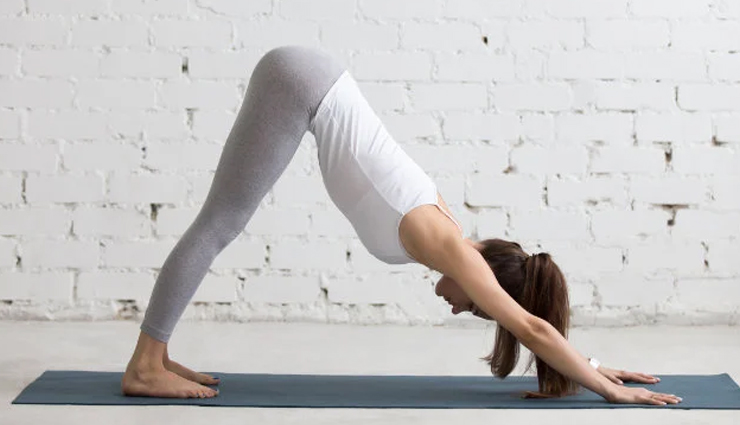
# Adho Mukha Svanasana
- Start on your hands and knees in a tabletop position. Your wrists should be directly under your shoulders, and your knees should be under your hips.
- Spread your fingers wide apart, with your middle fingers pointing forward. Press your palms firmly into the mat.
- Tuck your toes under and, on an exhale, lift your hips up toward the ceiling. Straighten your arms and legs as you do so.
- Create an inverted V-shape with your body, with your hips as the highest point. Your body should form a straight line from your wrists to your hips, and from your hips to your heels.
- Engage your core muscles to support your lower back and keep your spine long.
- Press your heels down toward the mat. They don't need to touch the mat, but you should feel a gentle stretch in your calves and hamstrings.
- Keep your head relaxed and let it hang naturally between your upper arms. Your gaze should be directed toward your toes or your navel, depending on your flexibility and comfort.
- Breathe deeply and evenly, focusing on the sensation of stretching and lengthening your spine.
- Hold Adho Mukha Svanasana for 30 seconds to 1 minute, or as long as is comfortable. Feel the stretch in your back, legs, and shoulders.
- To release the pose, bend your knees, lower your hips, and come back to a tabletop position.
- Rest in Child's Pose (Balasana) for a few breaths to relax your spine and shoulders.
Adho Mukha Svanasana is a versatile pose that offers many benefits, including stretching the back, shoulders, and hamstrings, strengthening the arms and legs, and promoting overall relaxation and stress relief.
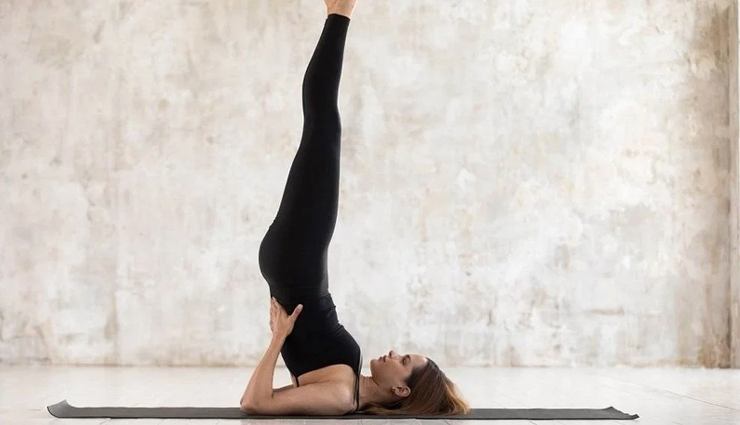
# Salamba Sarvangasana
- Start by placing a folded yoga blanket or mat on the floor to support your shoulders and neck. The blanket should be positioned horizontally.
- Sit on the edge of the blanket with your legs extended straight in front of you.
- Lie back onto the blanket, making sure your shoulders are supported, and your head is off the blanket with your neck resting on the edge.
- Bend your knees and place your feet flat on the floor, hip-width apart.
- Place your hands on the floor beside your hips, palms down, fingers pointing toward your feet.
- Engage your core muscles and press your hands into the floor to lift your legs off the ground, bringing your knees toward your chest.
- Inhale deeply, and as you exhale, lift your legs and hips off the ground. Your body should form a straight line from your shoulders to your feet.
- Keep your legs together and extend them vertically toward the ceiling. Your toes should point upward.
- Support your lower back with your hands, keeping your elbows shoulder-width apart. Your fingers can point up or hold onto your lower back for support.
- Maintain a firm foundation with your arms and shoulders. Your weight should be on your shoulders, not your neck.
- Keep your neck relaxed and gaze toward your chest, avoiding any strain on the neck.
- Breathe deeply and steadily in Salamba Sarvangasana, holding the pose for 30 seconds to 1 minute, or as long as is comfortable. Focus on your breath and the alignment of your body.
- To release the pose, exhale and lower your legs slowly toward the floor, keeping your feet hovering above the ground. Bend your knees and return to a seated position.
- Rest in Savasana (Corpse Pose) for a few breaths to relax your neck and shoulders.
Salamba Sarvangasana is known for its benefits in improving circulation, stimulating the thyroid gland, and calming the nervous system.
Note: Shoulder stands, including Salamba Sarvangasana, are considered advanced yoga poses and should be practiced with caution, especially by beginners. It's important to have proper guidance and be aware of contraindications, such as neck or shoulder issues, high blood pressure, or pregnancy. Consult a qualified yoga instructor or healthcare professional if you have any concerns.


