- Home›
- Healthy Living›
- 6 Yoga Poses To Help You Keep Your Kidneys Healthy
6 Yoga Poses To Help You Keep Your Kidneys Healthy
By: Priyanka Maheshwari Sat, 09 Sept 2023 1:38:43
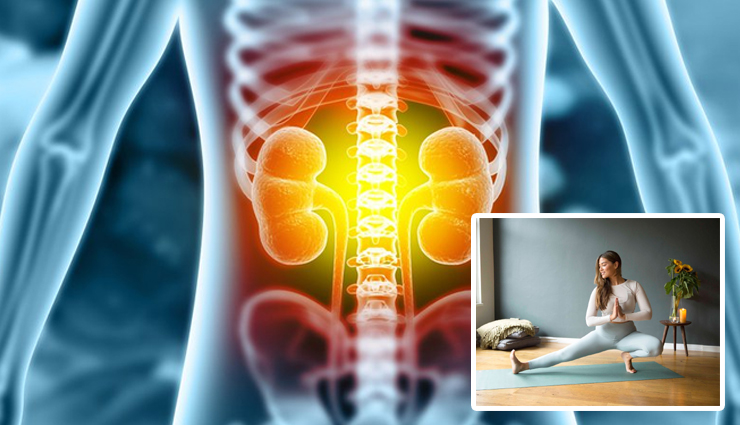
Healthy kidneys are essential organs in the human body, playing a vital role in maintaining overall health and well-being. These bean-shaped organs, each about the size of a fist, are located just below the ribcage on either side of the spine. Kidneys are responsible for several crucial functions that contribute to the body's overall equilibrium.
One of the primary functions of healthy kidneys is to filter waste products, excess fluids, and electrolytes from the blood to create urine. This process helps regulate the body's internal environment by maintaining proper fluid balance and electrolyte concentrations. Kidneys also play a crucial role in regulating blood pressure by controlling the volume of blood and releasing hormones like renin.
Another vital function of healthy kidneys is the production of erythropoietin, a hormone that stimulates the production of red blood cells in the bone marrow. This ensures that the body receives an adequate supply of oxygen.
Moreover, healthy kidneys help maintain proper levels of various minerals, such as sodium, potassium, calcium, and phosphorus, in the blood. They also assist in maintaining acid-base balance, which is essential for normal bodily functions.
In summary, healthy kidneys are integral to maintaining homeostasis within the body, regulating blood pressure, filtering waste products, producing hormones, and ensuring proper mineral and electrolyte levels. Caring for and preserving kidney health is crucial for overall well-being and longevity.
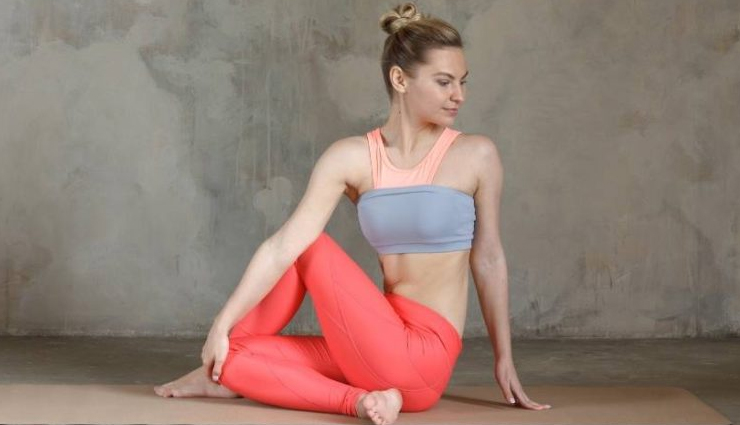
# Ardha Matsyendrasana
- Sit down on the floor with your legs extended straight in front of you.
- Ensure that your spine is erect, and your shoulders are relaxed.
- Bend your knees and place your feet flat on the floor, keeping them close to your buttocks.
- Cross your right leg over your left leg, placing your right foot on the floor beside your left thigh. Your right knee should be pointing up toward the ceiling.
- Bring your left foot outside your right thigh, placing it on the floor.
- Your left foot's sole should be flat on the ground, and your left knee should be pointing upward.
- Ensure that your sit bones (the bony parts of your buttocks) are grounded firmly on the floor.
- Check that your spine is still tall and straight.
- Inhale and extend your spine upward to lengthen it.
- On the exhale, twist your torso to the right, bringing your left elbow to the outside of your right thigh.
- Your left arm should be on the outside of your right knee, and your right arm should be behind you, with your fingertips on the floor for support.
- As you inhale, lengthen your spine again to create space.
- On the exhale, deepen the twist by gently pressing your left elbow against your right thigh, using it as leverage to twist your torso further to the right.
- Keep your chest open and your shoulders relaxed.
- Turn your head to the right and gaze over your right shoulder.
- Continue to breathe deeply and evenly.
- Hold Ardha Matsyendrasana for 20-30 seconds or longer, if comfortable.
- To release, inhale and slowly unwind from the twist.
- Straighten your legs and return to the starting position.
- Repeat the pose on the other side by crossing your left leg over your right and twisting to the left.
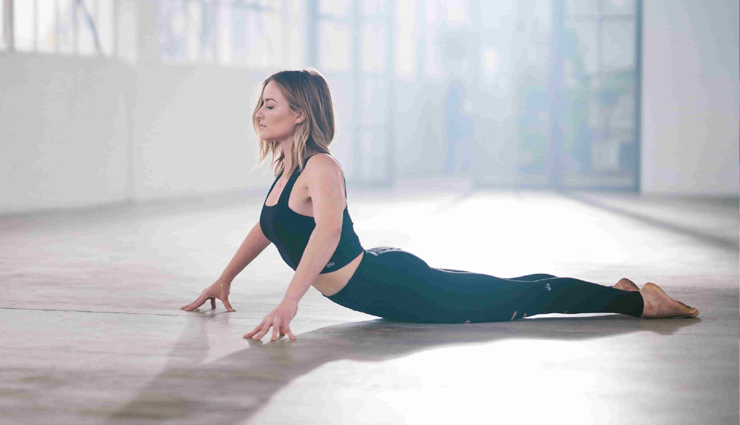
# Bhujangasana (Cobra Pose)
- Begin by lying flat on your stomach (prone position) on a yoga mat or a comfortable surface.
- Stretch your legs out behind you, with the tops of your feet resting on the mat.
- Place your palms on the mat, slightly below your shoulders, with your fingertips pointing forward.
- Ensure that your pubic bone is firmly grounded on the floor.
- Inhale deeply and gently engage your abdominal muscles by drawing your navel towards your spine. This action provides support for your lower back.
- Exhale slowly and, using the strength of your back muscles, lift your chest off the floor.
- Keep your elbows close to your body, pointing backward.
- As you continue to lift your chest, avoid putting excessive pressure on your hands. Use your back muscles to lift.
- Keep your neck in a neutral position or gently tilt your head backward, looking upward. Do not strain your neck by tilting it too far back.
- Hold the Cobra Pose for 15-30 seconds, breathing steadily. Keep your shoulder blades down and away from your ears.
- Exhale as you slowly lower your chest and forehead back to the mat.
- Rest with your head turned to one side and your arms alongside your body.
- You can repeat Bhujangasana 2-3 times if desired, gradually increasing the duration of the hold as your flexibility improves.
- After practicing Cobra Pose, take a moment to relax in the prone position, allowing your body to release tension.
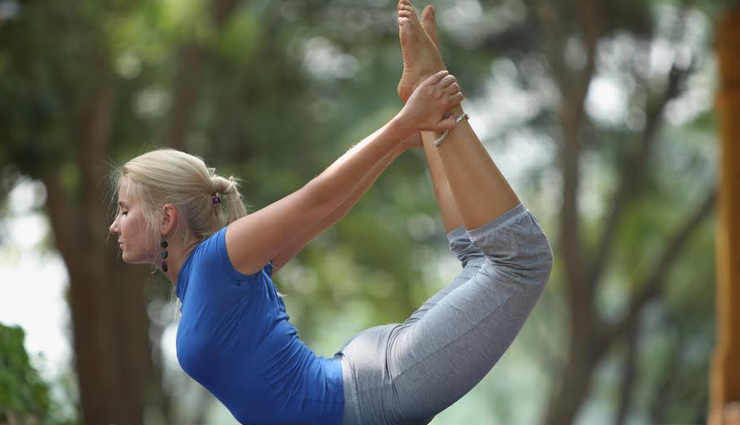
# Dhanurasana (Bow Pose)
- Begin by lying flat on your stomach (prone position) on a yoga mat or a comfortable surface.
- Stretch your legs out behind you, with the tops of your feet resting on the mat.
- Take a moment to relax and breathe deeply. This will help you prepare for the pose.
- Bend your knees and bring your heels close to your buttocks.
- Reach your arms backward and grasp your ankles. You can hold the outside of your ankles with your hands, with your fingers pointing toward your toes.
- Inhale deeply, and as you exhale, gently lift your chest, head, and thighs off the mat.
- Simultaneously, pull your ankles with your hands to create tension in the bow shape.
- Continue to lift your thighs and chest as high as you comfortably can. This will create a bow-like curve in your body.
- Keep your gaze forward, and try to maintain a relaxed facial expression.
- Hold the Bow Pose for 15-30 seconds, breathing steadily. Focus on lifting and opening the chest.
- Exhale as you gently release your ankles and lower your chest, head, and thighs back to the mat.
- After releasing the pose, turn your head to one side and rest for a few moments, allowing your body to relax.
- You can repeat Dhanurasana 2-3 times if desired, gradually increasing the duration of the hold as your flexibility and strength improve.
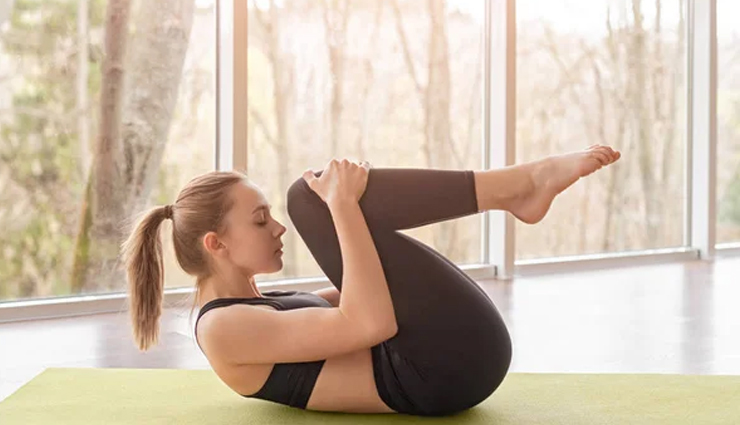
# Pavanamuktasana (Wind-Relieving Pose)
- Begin by lying flat on your back (supine position) on a yoga mat or a comfortable surface.
- Take a few deep breaths to relax and center yourself.
- Inhale and bend both knees, bringing them toward your chest.
- Exhale and wrap your arms around your knees.
- Clasp your hands together, either over your knees or just below them, depending on your comfort and flexibility.
- As you inhale, lift your head and shoulders off the mat and bring your nose toward your knees.
- Keep your chin tucked slightly toward your chest to lengthen the back of your neck.
- Exhale as you gently squeeze your knees into your chest.
- Hold this position for 15-30 seconds or longer, breathing deeply and evenly.
- Release the pose by lowering your head and shoulders back to the mat.
- Extend your legs back out and relax for a moment.
- You can repeat Pavanamuktasana 2-3 times if desired.
- To increase the stretch on one side, you can perform a variation of this pose by hugging one knee to your chest while extending the other leg straight. Hold for the same duration and then switch sides.
- After completing the pose, release both legs and relax in the supine position for a few breaths.
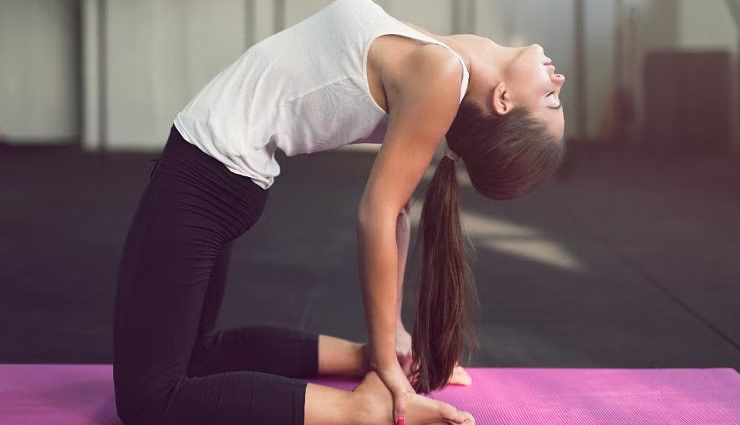
# Ustrasana (Camel Pose)
- Begin by kneeling on your mat with your knees hip-width apart.
- Ensure that your thighs are perpendicular to the floor and that your feet are pointing directly behind you.
- Place your hands on your hips with your fingers pointing downward. Keep your elbows close to your body.
- Inhale deeply, engage your core muscles, and lengthen your spine.
- As you exhale, start to lean back, keeping your hips aligned with your knees.
- Keep your thighs and hips perpendicular to the floor.
- Reach your right hand back toward your right heel and then your left hand back toward your left heel.
- If you cannot reach your heels comfortably, place your hands on your lower back for support.
- Once your hands are on your heels or your lower back, push your hips forward to open your chest.
- Arch your back, gently lifting your chest and heart toward the ceiling.
- If it's comfortable for your neck, allow your head to gently drop backward. Do not strain your neck; keep it in a comfortable position.
- Hold Ustrasana for 15-30 seconds or longer if you are comfortable.
- Continue to breathe deeply and evenly.
- To release, bring your hands back to your hips.
- Slowly lift your torso upright, keeping your spine long.
- You can then sit back on your heels in a kneeling position to rest for a moment.
- After practicing Ustrasana, take a few deep breaths and relax, sitting on your heels, or lying flat on your back with your arms by your sides.
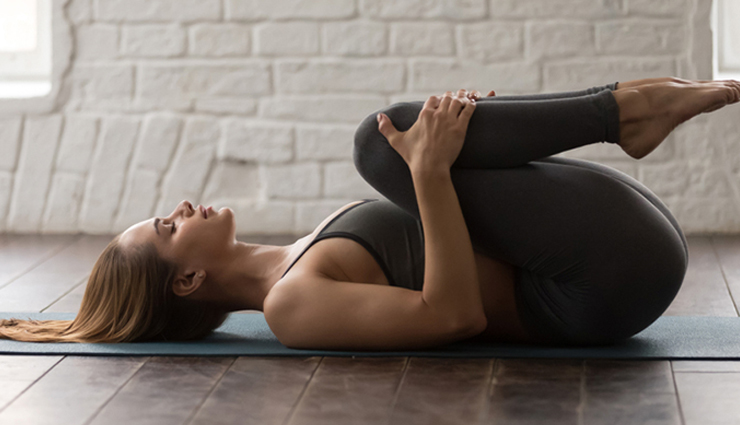
# Apanasana (Knee-to-Chest Pose)
- Begin by lying flat on your back (supine position) on a yoga mat or a comfortable surface.
- Take a few deep breaths to relax and center yourself.
- Inhale and bend both knees, bringing them toward your chest.
- Exhale and wrap your arms around your knees.
- Clasp your hands together, either over your knees or just below them, depending on your comfort and flexibility.
- Inhale deeply, and as you exhale, gently squeeze your knees into your chest.
- If comfortable, lift your head and shoulders off the mat and bring your nose toward your knees.
- If you have any neck issues or discomfort, you can keep your head resting on the mat.
- Hold Apanasana for 15-30 seconds or longer, breathing deeply and evenly.
- As you hold the pose, focus on relaxing your lower back and hips. Feel the gentle stretch in your lower back and hip flexors.
- Exhale as you release your knees and lower your feet back to the mat.
- Extend your legs fully and relax for a moment.
- You can repeat Apanasana 2-3 times if desired.


